Showing posts with label catrice. Show all posts

Sunday, 24 May 2015

The Nerd-Geek Challenge Prompt 4: Fantastical Beast!

 *Disclaimer: some items in this blog post have been previously received for review.


Hi everyone!

I'm having a very busy weekend so this post will be a bit shorter - but equally as fun! :D

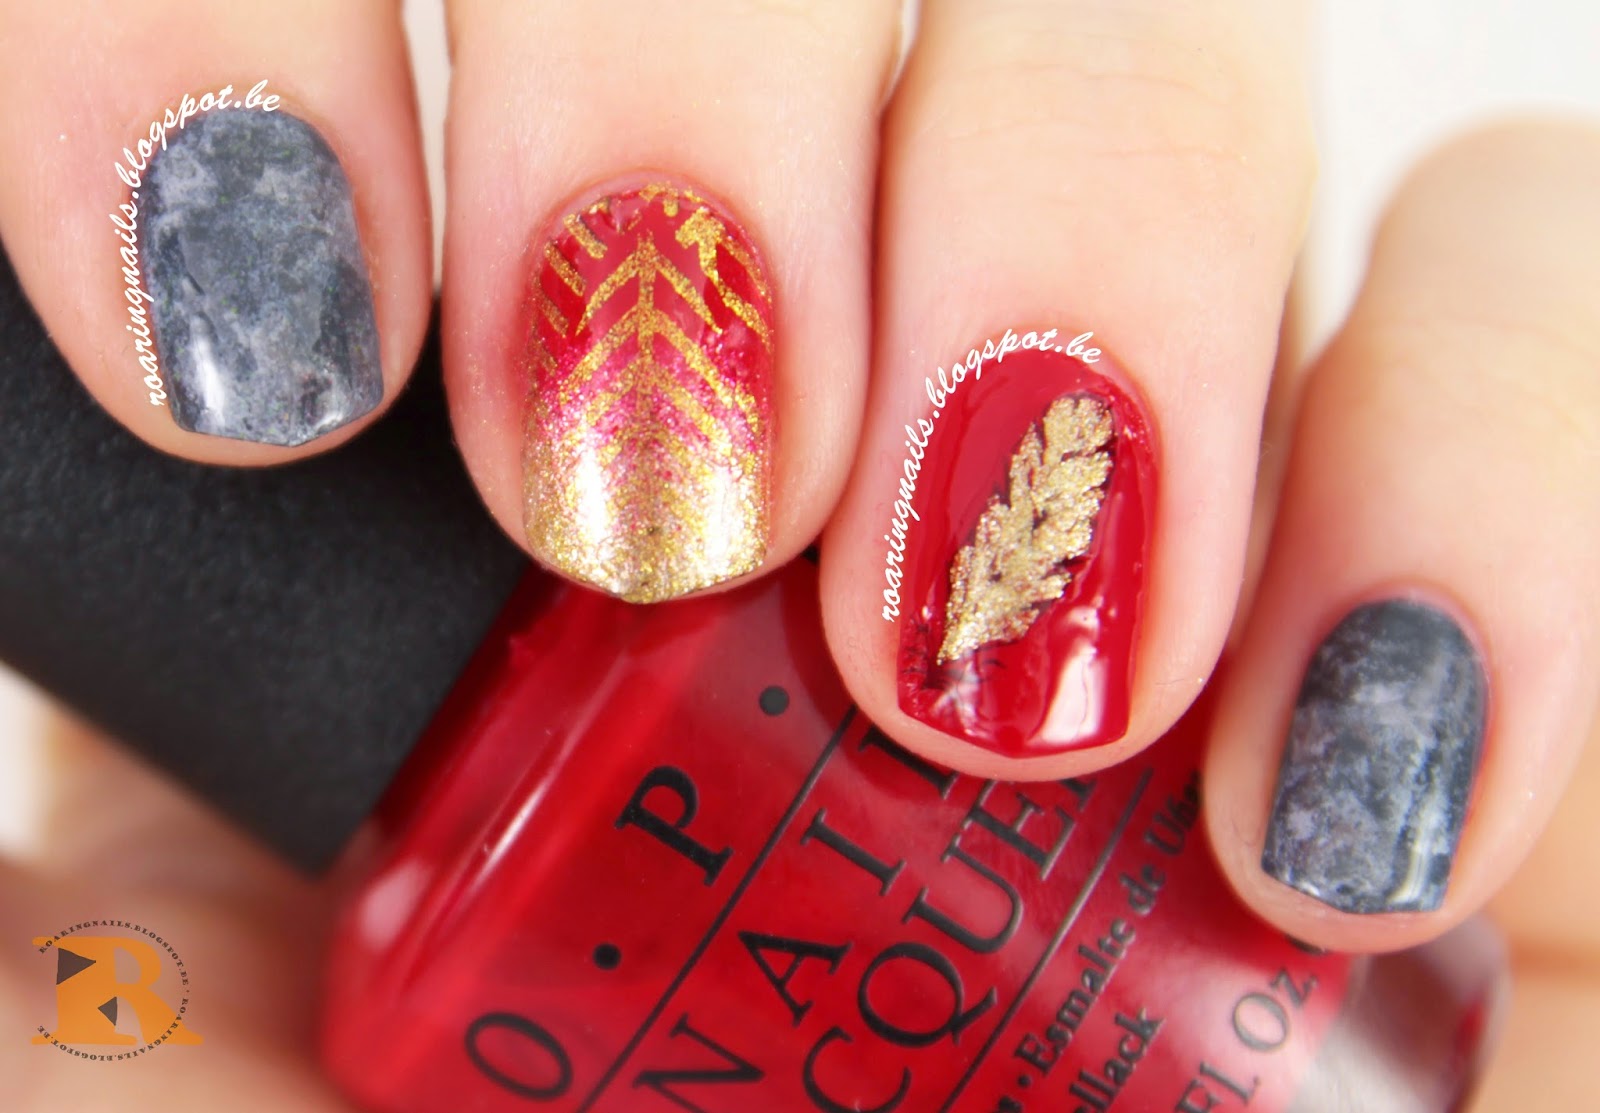
It's the FINAL prompt for Franzi's and mine's Nerd-Geek Challenge!! Today's prompt is "Fantastical Beast". Guess what I picked? ;)

Friday, 8 May 2015

Born Pretty Store Review - Lipstick Charm

*Disclaimer: this item was received for review. All opinions expressed are my own and are not influenced by anyone of anything.
*Disclaimer: some items in this blog post have been previously received for review.


Hi everyone!

Today I have a Born Pretty Store review for you all! I tried out a cute lipstick charm as you can see.

Wednesday, 15 April 2015

Some New Swatches - NY Lover, Boho Look and Leather Effect Bordeaux


Hi! :D

You might remember my January-February haul post. You already saw my Sally Hansen Satin Glam swatches and the swatches of the polishes I got as a gift from Miriam. Today I'll be showing you some more swatches of that haul. This post has been lurking in my unpublished folder for a while now, so it's glad to finally come out!

I'm going to show you Catrice Earnie & Birdy, Maybelline NY Lover, L'Oreal Boho Look and 2B Leather Effect Bordeaux

Monday, 9 March 2015

Mani Swap With Jayna from The Sequined Nail!


Hi!!

Today's post features a mani swap!! (lol I first typed "man swap" haha!)

The very sweet Jayna from The Sequined Nail asked me to do a mani swap with her a totally big while ago, but as you know, life always get in the way! (well, life and school work, mostly)

Friday, 6 March 2015

January - Februari Polish Haul!


Hi everyone!!

I've been buying A LOT of polish these past few weeks - since the exams are over, I felt like I could treat myself to some goodies :) So today I'll be showing you my January - February haul! If you follow me on Facebook you might have seen some of these already - but not all of them! ;)

Saturday, 28 February 2015

Under The Sea


Hi!!

I 'm showing you a nail art that I am really really proud of today. I was inspired by this swatch of Starrily Sea Glass by Chalkboard Nails. I love how that polish looks, and I wanted to do a similar "sea-ish" thing.

I wanted the design to have a lot of depth, and make it look like you were staring down in a tropical ocean with all kinds of treasures.

Tuesday, 3 February 2015

Hey There, Sailor!


Hiii everyone!

I have a quick nautical design to show you today! From the vaults, as my nails are still restoring from weeks of maltreatment due to the exams. (you see, exams are good for nothing lol)

Tuesday, 23 December 2014

Christmas Sweater Sparkles


Hiii!!

As you will probably know already, it's almost Christmas! :D (Emily will be so excited lol!)

I decided it was finally time to create a Christmas design. I'm not really a person to make seasonal appropriate nail art - I just do designs when I think of them. So I don't feel the need to create a whole bunch of Christmassy designs just because it's that time of the year.

Thursday, 26 June 2014

Wild Zebra Hearts - Recreation of Nail Polish Society


Hello my polish loving friends!

In today's blog post I'll be showing you my recreation of an awesome design by Nail Polish Society - you can see hers here

Thursday, 22 May 2014

Ice Queen


Hello everyone!

Today I have a water spotted manicure for you all!
I used a gorgeous blue Catrice polish as a base (unfortunately, the name on the polish has completely vanished because I've had it for so long) and did the water spotting technique with OPI's Push and Shove.

Tuesday, 6 May 2014

Mermaid Nails! - BornPretty Store review

*Disclaimer: this product was provided for review. All opinions in this blogpost are my own and are not influenced by anything of anyone.


Hi everyone!

Today I have another review from BornPretty Store for you, together with this mermaid nail art! (If you missed my previous review, click here!)

The second item I chose to review for BornPretty Store are these golden sea shell studs. They are available in gold and silver, and in sizes 3mm and 5mm. You get 20 shells in a pack.

I chose the gold 3mm shells because I liked that size and colour :)


The most obvious thing to do with shell studs is of course something mermaid-y and since I hadn't done mermaid nails yet because I didn't have the right polish colours and studs, this was the perfect chance to try them out!

The polishes I used for this design are:
Spectral Green - Nocibé
Trophy Wife - Essie (I actually bought this polish with the excuse that it was perfect for mermaid nail art haha)
Vampire Vanity - Bourjois Paris
Goldbusters - Catrice


I also used some studs and rhinestones I bought in a local store, and of course the sea shells from BornPretty Store!


First I'll explain how I made the mermaid design, and then I'll give some more information about the studs.

Now, I started out with a gradient with Trophy Wife and Spectral Green:


Then I drew a half moon with white acrylic paint on my index finger and little finger. I then applied Vampire Vanity on those nails (but not in the little half moon part). I also painted some fish scales with acrylic paint on my thumb and ring finger. I do need to work on my fish scale painting skills though :/


And then finally I added all the studs and rhinestones:


 The sea shell studs were very easy to work with: they are a bit curved so they stick to your nail properly. They also don't stick off of your nail very much as they're quite thin.

I just applied them to my nail after I put on some top coat, and then I put some top coat on top of the shells to keep them in place.


The final judgement: I'm very happy about these sea shell studs. The only downside is that you only get 20 in a pack, but on the other side: I'm really not going to do some mermaid nail art every week so I'll be able to go a while with these. You can also re-use them if you don't remove them with polish remover, but try to pick them off your nail.

The price: These shell studs cost $2.78 at the moment.

Where can you get them: You can order these shells in 2 different colours (gold and silver) and 2 different sizes (3mm and 5mm) here on the BornPretty Store website!

Discount?: Like I mentioned in my previous review, I have a discount code for BornPretty Store that will get you 10% off on your order! Just use XDX31 when you order something :)


That's it for my second review! If you have any more questions, feel free to ask! :)

Thanks for reading!

---------------------------------------------------------------------------------

Monday, 14 April 2014

Water Spotted Berry Potter


Hi everyone!

I am super pleased with how today's manicure turned out! I used the water spotting technique to create this design, and this is the first time water spotting actually worked with me! (yeey go me)
A few weeks ago I saw a gorgeous water spotted manicure by The Adorned Claw (here's her blogpost) and she said in her post that she used perfume for this technique. Now, I've tried a bunch of things for water spotting, but perfume wasn't one of them yet!

I had already tried to do it with lots and lots of hair sprays, but that failed miserably every time because the spray that came out of it was too much and just made one big hole in the polish instead of several small ones like it's supposed to.


I loved the manicure Ruth did, so I got inspired to try water spotting once more :) And it worked! I'm so glad she said she used perfume for it, because perfume is so perfect for this technique but I hadn't thought of using it myself.

The polishes I used here are:
Alpine Snow - OPI
Berry Potter and Plumbledore - Catrice

Yes, you read that right: Berry Potter and Plumbledore! This must be the awesomest name for a polish I have come accross ever! When I saw this polish in the store, I immediately grabbed it - I didn't even care about the colour or whatever, I just HAD to have that polish because of the name because I am a biiiiiiiig Harry Potter fan. Do you ever get that, that you really want to buy a polish because of its name?

Berry Potter is a purple polish with some blue-ish shimmer to it - you can see it a tiny bit in some of my pictures, but it's not super apparent here because of the water spotting.


So, I started out by painting two coats of Alpine Snow on my nails and then waited until it had fully dried. I put some scotch tape around me nails to avoid too much of a mess and too much clean-up. I then grabbed a small plastic cup, filled it with water (room temperature) and put in some drops of Berry Potter. 

Then I sprayed on the surface of the polish with some old perfume I never use anymore, and dipped my finger in where I liked the spots it had created. I waited until the polish on the surface had dried, cleaned that up with a toothpick, and pulled my finger out of the water - it's the same you do for water marbling, really.

The only downside to using perfume is that I had to air out my bathroom for two days and my nails smelled like perfume A LOT, but I guess there are worse things in life than having perfume scented nails for a few days :)


I re-did this design one time, because I didn't really like the spots that my first try had created - but since they are so easy and quick to make, it's not too much of a fuss to re-do it luckily!


Do you like these? I absolutely adore them, I'm so glad the technique worked!

And please, if you know any more polishes with amazing and funny names, let me know in the comments! I am really curious! I suppose a lot of indie polishes have amazingly creative nails, especially when a collection is based on some television show or something else from popular culture.

Thanks for reading!
Thursday, 10 April 2014

Classic Leopard Print With a Twist


Hello all you fierce tigers! Or leopards, to be more in theme with today's post!

If you've followed me for a while on here, then you know I'm a sucker for leopard print. Funnily enough, I actually don't own any clothes with leopard print on them - maybe I'm overcompensating for that on my nails haha.

Today's design is the classic leopard print, but with a twist to it!


The colours I used for this design are:
Goldbusters - Catrice
Black on Black - Sinful Colors
Chocolate Chips - Only You
African Queen - Only You

I started out by painting my nails gold with Goldbusters (awesome name by the way - I always love it when a polish has a name that refers to popular culture). This golden polish is a bit more yellow than the previous one I had (Goldfinger by Catrice) and I like my old one better - I'm just not a big fan of yellow. But gold is gold I presume, so on with the design!


I then created the brown leopard spots by mixing my two brown polishes together (because the one is too light for the spots and the other one's colour is too dark) and using a dotting tool to make the uneven spots. Then I did the outline with black polish and a small brush.

I felt something was missing in this design (I think it felt a bit off because my gold polish was more yellow than the previous one and it just looked different to me) so I made black strokes.

Awkward thumb shot to show off that poor forgotten finger as well for once
I used some striping tape to get clean lines, and did an accent on my ring finger. I  first placed the studs on my nails (but without sticking it on) so I could place my striping tape just next to it, in order to get the right width of the black strokes. Does that explanation make sense? It's hard to explain it properly in English, but I hope it's clear.

I took the studs off again to paint the black strokes, took the striping tape off, and then I put the golden studs on again and sealed them in with a royal amount of top coat.

Now to be honest, I'm not 100% pleased with this design. I'm not sure why though. Maybe it's the yellow golden polish, or maybe the black strokes with studs don't really work here. I did get some compliments about my nails today, so other people seem to like it a lot, and it really did grow on my during the day. Maybe I'm just being too critical of myself :)


What do you think of this design? Raauwtch or aauwtch? (haha see that I made a leopard pun thing - I'm so funny)

Thanks for reading!

Monday, 7 April 2014

Pastel Love


Hi lovelies!

Today I have a pastel design for you!
I bought some new polishes a few weeks ago and one of them was "C03 Evergreen 60s" by Catrice. 
This is a limited edition polish from the Crème Fresh collection.


I just love mint green so I couldn't resist this polish :) I would have bought more from the 60s inspired collection but this was the only colour left at the time - I might go back to see if the store has some of the other colours again.

The Evergreen polish wasn't the easiest to work with, however - it got thick very quickly, I had to be really careful to use thin coats because otherwise the polish would just drag and create lumps. 

The drying time was, unfortunately, quite bad: normally I can paint my second coat of polish on my left hand thumb when I have finished my first coat on both hands (starting with left hand thumb and ending with right hand pinky), but I really had to wait about 20-30 minutes here (I didn't time it, I'm sorry, so I'm not quite sure of the exact time). Maybe the coats I used were still too thick or something - very very thin coats are a must with this polish.

When I drew on the hearts for this design, that was really tricky - Evergreen would just thicken sooo quickly and lump together - you can see that a few hearts have some lumps here and there. The polish also has a streaky finish. Haha, so okay it's really not the easiest polish to work with, but I'm actually very glad with it because of the gorgeous pastel colour and the pearly like finish, but I have to get used to working with this polish.

The other colour I used for this design is Essie's Muchi, Muchi. 


I found inspiration for today's design in this Pond Manicure by Adventures in Acetone. I thought the idea of layering a sheer polish was so fun, so I tried it out myself, and I also made little hearts like Adventures in Acetone because they look so cute :)


I painted three coats of Evergreen on my thumb, index finger and little finger. The polish has such an amazing colour and finish - it's shiny, but also a bit pearly (if that makes sense, a pearly finish?). I used a top coat for extra shine.

On my middle finger and ring finger I started with one coat of Muchi, Muchi. Then I drew on 3 hearts on each nail with Evergreen. I did another coat of Muchi, Muchi on top of that, and again added a few hearts. Another coat of Muchi, Muchi, some more hearts, and then a final coat of the Essie polish to finish it. And top coat for extra shine of course.

As you can see, my nail line is still a bit visible on those two nails, but it doesn't really bother me in this design. And I love the pastel look of it all :)


That's it for today's design! Have you tried this layering technique yet? I think it looks super fun and it's really easy to do :)

Thanks for reading!

Thursday, 27 February 2014

Catrice - Mint Me Up


Hello all!

Today I have some swatches of a gorgeous polish for you!


I don't know if you remember my polish haul from a few weeks ago (here's the blogpost), but this Catrice polish was one of my many buys.


It's called Mint Me Up, and it's a mint green (what else right, with that name?) polish with a shimmer of gold in it.


You can already see this shimmer in the bottle, and it's also very clear in the first picture above and the one here below:


Pretty, right? :) This polish looks very lovely - I just adore the little specks of gold in it.
I used three coats here for full coverage and the polish was very easy to apply.


In the picture above you can see the specks of gold more clearly (instead of the shimmer, I mean).

So normally, when a lot of light hits my nails, the mint green polish has a golden shimmer.
But when it's a bit more in the shade, you see these tiny dark spots in the polish - those are the gold flecks, but they look blackish when light doesn't hit them directly. I hope you can see what I mean :)


I really like this polish! I already have a polish in a similar colour called Miss Minty by Gosh, but that one is just plain mint green - I've used this polish in this and this design, if you're interested :)

Mint Me Up is very unique in my collection because of the gold shimmer, and it makes the polish instantly more special and spectacular :)

I hope you like it as much as I do! Thanks for reading!

Wednesday, 19 February 2014

Bright Pink and Orange Leopard Print


Hello everyone!

Today I have a very bright leopard print mani for you!
I was a bit sick of the bad weather, the cold, and all the rain in my country, so I decided to do a very bright leopard design to cheer me up!

These are the colours I used:

Black on Black - Sinful Colors
Mate 01 - D'Orleac
The Pinky And The Brain - Catrice

I started off by painting my nails in the base colour - orange or pink, depending on which nail.


I'm a bit dissapointed in The Pinky And The Brain, I found that it doesn't cover well at all...
I got this polish for free in a promotion, and I already have a really similar bright pink, so it's not a tragedy that this one doesn't cover well, but I was still quite surprised. I needed 4 coats to hide visible nail line...

For the orange polish I needed 3 coats to get full coverage.

After I had applied the base colour, I just made small random spots in either orange or pink with my dotting tool. I let everything dry, and then I made the black lines with a small brush.


And that's it!
I topped everything off with a shiny topcoat. The orange polish is actually a matte polish, but I love it a lot when it's shiny as well (and well, since I have no non-matte orange polish yet, this one has to do for now).


I'm thinking of renaming my blog to "rexxx does leopard print" haha, I do so many leopard print designs. But I can't help it, I just absolutely adore leopard print on my nails!

Hope you like my nails as much as I do and thanks for reading!

Wednesday, 29 January 2014

Polish Haul!

Hi everyone!

About a week ago I treated myself to some new polishes, since I just had finished writing two papers for my exams :)

Here's my haul:


As you can see, I bought seven new polishes (yeah, one is hiding behind the Essie polish), some cuticle cream and a nail wheel with studs in it.

Here's everything in more detail:


Here are Mint Me Up by Catrice, Two Million Dollar Baby by Catrice, Sugar Crystals by Maybelinne New York Color Show, and Gris Cashmire by Arcancil.

I already used a lot of my new polishes in a design, which you can see here!


I also bought Muchi, Muchi by Essie and 847 by Deborah Milano. 


And yes, a fast drying top coat from Only You, some cuticle cream by HerĂ´me, and a nail wheel with several studs in it - some gold ones, some black stars and rhinestones, all really cool!

I already used one of these studs here! (yeah, same design as for the polishes, I just wanted to use everything I bought at once!)

I am now officially addicted to cuticle cream, I just smear it on whenever I think about it haha.

Also: I made some changes to my blog! I know it's been a while since the Beginner Blogger's Bootcamp feedback session by Will Paint Nails For Food, but I have had a very busy month with exams and papers, so I only just now had the change to make some proper changes to the blog.

I want to thank everyone who gave feedback, because I got some really good suggestions!
I've added a few buttons that make it easier for people to follow me here and find me on other social media, and I've changed my banner as well :)

Hope you like it!